How to install insulated siding is a project that many homeowners tackle, offering significant energy savings and aesthetic upgrades. This guide delves into the process, from selecting the right materials and planning the installation to the final finishing touches and ongoing maintenance. We’ll explore various siding types, their pros and cons, and provide a step-by-step approach ensuring a successful and efficient installation.
Understanding the nuances of insulated siding installation is key to achieving a long-lasting, energy-efficient, and visually appealing exterior. This guide will equip you with the knowledge and practical steps needed, whether you’re a seasoned DIY enthusiast or a first-timer tackling a home improvement project. From preparing the wall surface to correctly fastening the siding, we cover every detail to ensure a professional-looking finish.
Understanding Insulated Siding
Insulated siding offers a compelling blend of aesthetics and energy efficiency, making it a popular choice for homeowners seeking to improve their home’s exterior and reduce energy costs. Understanding the different types available, their advantages and disadvantages, and their comparative performance is crucial for making an informed decision.
Insulated Siding Materials
Several materials are used in the construction of insulated siding. Each offers a unique set of properties affecting its performance, cost, and lifespan. Common types include:
- Fiber Cement: A composite material made of cement, cellulose fibers, and other additives. It’s known for its durability, fire resistance, and low maintenance requirements. The insulating properties are achieved through a foam core often incorporated within the siding panels.
- Vinyl: A popular and cost-effective option, vinyl siding is lightweight, easy to install, and comes in a wide range of colors and styles. Insulated vinyl siding incorporates a foam backing to enhance its thermal performance.
- Foam-Backed Aluminum: Aluminum siding, known for its durability and resistance to dents and scratches, can be combined with a foam backing to create an insulated system. This option is often more expensive than vinyl but offers superior longevity.
- Wood: While traditional wood siding isn’t inherently insulated, it can be combined with insulation materials like foam sheathing during installation to achieve a similar effect. This option offers a classic look but requires more maintenance than other types. Proper sealing and periodic painting or staining are essential.
Advantages and Disadvantages of Insulated Siding Materials
The choice of insulated siding depends heavily on individual needs and priorities. Weighing the pros and cons of each option is essential. For example, fiber cement offers exceptional durability but comes at a higher initial cost. Vinyl is budget-friendly but may not last as long as other materials.
Thermal Performance Comparison
The R-value is a measure of a material’s resistance to heat flow. Higher R-values indicate better insulation. The R-value of insulated siding varies depending on the material and the thickness of the insulation layer. Generally, foam-backed vinyl and fiber cement offer higher R-values than aluminum siding, while foam-backed aluminum can compete with fiber cement, depending on the thickness of the foam core. Wood siding, when properly installed with foam sheathing, can achieve comparable R-values. However, consistent performance depends heavily on proper installation techniques.
Cost, Lifespan, and Maintenance
The following table summarizes the cost, lifespan, and maintenance requirements of different insulated siding options. These are estimates and can vary depending on factors like location, labor costs, and specific product choices.
| Siding Type | Cost (per sq ft, approximate) | Lifespan (years) | Maintenance |
|---|---|---|---|
| Vinyl (Insulated) | $3-$7 | 20-40 | Low; occasional cleaning |
| Fiber Cement (Insulated) | $8-$15 | 50-80 | Moderate; periodic cleaning and painting/staining may be needed |
| Aluminum (Insulated) | $10-$18 | 40-60 | Low; occasional cleaning |
| Wood (with insulation) | $12-$25+ | 30-50+ (with proper maintenance) | High; regular painting/staining, caulking, and repairs |
Planning the Installation
Successful insulated siding installation hinges on meticulous planning. A well-defined plan ensures efficiency, minimizes waste, and ultimately leads to a superior, long-lasting result. This section outlines the key steps involved in preparing for your insulated siding project.
Step-by-Step Installation Plan
A typical insulated siding installation follows a sequential process. First, thorough preparation of the existing wall surface is crucial. This involves cleaning, repairing any damage, and ensuring a level and stable base. Next, the installation of any necessary sheathing or underlayment is undertaken. Following this, the insulated siding panels are installed, starting from a corner and working systematically across the wall. Finally, the installation of trim pieces, such as corner and J-channel, completes the process. This methodical approach minimizes errors and ensures a professional finish.
Necessary Tools and Materials
The tools and materials required for installing insulated siding vary depending on the specific project and the type of siding being used. However, a typical list includes: measuring tape, level, chalk line, circular saw or hand saw, drill with various drill bits, hammer, safety glasses, work gloves, utility knife, caulk gun, sealant, fasteners (appropriate for the siding type), insulated siding panels, trim pieces (corner and J-channel), and potentially, a nail gun for increased efficiency. It is always advisable to check the manufacturer’s instructions for specific recommendations regarding fasteners and tools.
Safety Precautions
Safety should be the paramount concern during any construction project. Working at heights requires the use of appropriate fall protection equipment, such as harnesses and safety lines. Eye protection is essential to shield against flying debris, while gloves protect hands from sharp edges and splinters. Proper ventilation is also important, especially when working with certain sealants or adhesives. Furthermore, always disconnect any electrical power to the area before commencing work to prevent accidental electrocution. Finally, familiarize yourself with the Material Safety Data Sheets (MSDS) for all products being used to understand any potential hazards and appropriate handling procedures.
Wall Surface Preparation
Proper preparation of the existing wall surface is critical for a successful and long-lasting siding installation. A poorly prepared surface can lead to issues such as uneven siding, gaps, and ultimately, premature failure of the siding system. This preparation includes a thorough cleaning to remove dirt, debris, loose paint, and any other contaminants. Any damaged areas of the existing wall, such as rotted wood or cracked stucco, must be repaired and made sound before the new siding is installed. Furthermore, ensuring the wall is level and plumb is crucial for achieving a neat and professional-looking finish. This may involve shimming or other adjustments to achieve a consistent surface. Failing to adequately prepare the wall surface can lead to costly repairs down the line, highlighting the importance of this often-overlooked step.
Installation Process
Preparing the existing wall for new insulated siding is crucial for a successful and long-lasting installation. Proper preparation ensures a strong bond, prevents future problems, and maximizes the insulating properties of the new siding. This section details the necessary steps, from removing old siding to installing weather barriers and flashing.
Old Siding Removal
Removing existing siding requires careful attention to avoid damaging the underlying structure. Begin by carefully detaching the siding from its fasteners, starting at the bottom and working your way up. Use a pry bar or similar tool, but exercise caution to prevent gouging or damaging the sheathing. If the siding is particularly stubborn, consider using a heat gun to soften the sealant, making removal easier. Once removed, inspect the underlying sheathing for any damage and repair as needed before proceeding. Dispose of the old siding responsibly, following local recycling guidelines where possible. Remember to wear appropriate safety gear, including gloves and eye protection, throughout this process.
Wall Surface Preparation
After removing the old siding, a thorough inspection of the wall surface is necessary. Repair any damaged areas, such as rotted wood or cracked drywall, using appropriate patching materials and techniques. Ensure all surfaces are clean and free of debris, loose paint, or other contaminants that could interfere with adhesion. Fill any gaps or holes with caulk or expanding foam to create a smooth, even surface. For particularly uneven surfaces, consider applying a layer of sheathing to create a more consistent plane for the new siding. This step significantly improves the overall appearance and performance of the final installation.
House Wrap Installation
Installing a house wrap, such as Tyvek or similar weather barrier, is essential for protecting the wall assembly from moisture intrusion. Begin by unrolling the house wrap, overlapping the edges by at least 6 inches to create a watertight seal. Secure the house wrap to the wall using staples or nails, ensuring that it is taut and wrinkle-free. Pay close attention to corners and edges, carefully folding and taping the house wrap to create a secure seal. Remember to always follow the manufacturer’s instructions for proper installation. A properly installed house wrap acts as a crucial first line of defense against water damage.
Flashing Installation Around Windows and Doors
Proper flashing installation around windows and doors is critical to prevent water from penetrating the wall assembly. Flashing should be installed before the siding is applied. Begin by installing flashing around the window or door frame, ensuring that it overlaps the existing structure and extends beyond the frame to create a watertight seal. Use sealant to ensure a proper bond between the flashing and the surrounding materials. The flashing should extend upwards, creating a drip edge to direct water away from the opening. For windows and doors with multiple layers of flashing, ensure each layer overlaps the one below to provide maximum protection. Properly installed flashing significantly extends the lifespan of the building by preventing water damage.
Installation Process
Installing insulated siding is a multi-step process requiring precision and attention to detail. Proper installation ensures the longevity and effectiveness of the siding, maximizing its insulating properties and aesthetic appeal. This section details the installation of the first course, proper fastening techniques, and methods for managing corners, windows, and doors, as well as trim installation.
Installing the First Course of Insulated Siding
Begin by establishing a level starting point at the bottom of the wall. This is crucial for maintaining a straight and even installation across the entire surface. Use a level and chalk line to mark this initial course. The first piece of siding should be installed precisely along this line, ensuring a clean and professional finish. This initial course acts as a foundation for all subsequent courses, so accuracy here is paramount. The bottom edge of the siding should be firmly seated against the foundation or weather barrier. Next, use appropriate fasteners to secure the siding to the wall framing. Overly tight fastening can damage the siding, while insufficient fastening will compromise structural integrity. The manufacturer’s instructions should provide guidance on the optimal spacing and type of fasteners. Remember to leave the necessary expansion gap recommended by the manufacturer to allow for thermal expansion and contraction.
Fastening the Siding to the Wall
Proper fastening is essential for the long-term performance of insulated siding. Use corrosion-resistant fasteners specifically designed for the type of siding being installed. The fasteners should be driven straight into the wall framing, avoiding any damage to the siding. Spacing between fasteners should adhere strictly to the manufacturer’s recommendations. Typically, fasteners are driven near the top and bottom edges of each siding panel, providing sufficient support. Avoid over-tightening, which can crack or damage the siding. Under-tightening can lead to loose siding and potential wind damage. The use of a self-drilling screw will ensure that you can drive through the siding and into the framing material without pre-drilling.
Cutting and Fitting Siding Around Corners, Windows, and Doors
Cutting insulated siding requires care to maintain a clean, professional appearance. Use a sharp utility knife or a circular saw with a fine-tooth blade for precise cuts. For corners, measure carefully and make accurate cuts to ensure a tight fit. Use corner trim to create a neat and weather-resistant finish. Around windows and doors, measure carefully and make precise cuts, allowing for proper clearance and a snug fit. Use window and door trim to create a professional finish and protect the edges of the siding. Always remember to leave the appropriate expansion gap to account for temperature changes. Precise cuts will minimize waste and ensure a seamless integration of the siding with the building’s architectural features.
Installing Trim and Accessories
Trim pieces are crucial for enhancing the appearance and weather-tightness of the insulated siding installation. J-channel is commonly used for finishing the edges of the siding at corners, around windows and doors, and at the bottom of the installation. Start and stop channels provide a neat and professional finish at the beginning and end of each course. These trim pieces are usually fastened with the same fasteners used for the siding, adhering to the manufacturer’s specifications for spacing and depth of penetration. Proper installation of trim ensures a clean, finished look and protects the edges of the siding from damage. Using the correct type and size of trim for each application is essential to achieve a professional finish.
Finishing Touches and Maintenance
Proper finishing touches and a consistent maintenance schedule are crucial for ensuring the longevity and effectiveness of your new insulated siding. Neglecting these steps can lead to premature deterioration, compromising both the aesthetic appeal and the energy efficiency benefits of your investment. This section details the final steps in the installation process and provides a guide for long-term care.
Caulking and Sealing
After installing the insulated siding, carefully inspect all seams, joints, and areas where the siding meets other building components (like windows and doors). Any gaps or cracks, however small, should be filled with a high-quality, exterior-grade caulk. Choose a caulk that is compatible with your siding material and is designed to withstand exposure to the elements. Apply the caulk smoothly and evenly, ensuring complete coverage of the gap. Allow the caulk to cure completely according to the manufacturer’s instructions before exposing it to rain or extreme temperatures. This step prevents water infiltration, which can lead to mold growth, rot, and structural damage. Pay particular attention to areas around windows and doors, as these are common points of water entry. A properly caulked installation significantly improves the building’s weather resistance.
Cleaning and Maintenance of Insulated Siding
Regular cleaning helps maintain the appearance and functionality of your insulated siding. For most types of insulated siding, a simple washing with a garden hose and a soft-bristled brush is sufficient. For stubborn dirt or grime, you can use a mild detergent solution. Avoid harsh chemicals or abrasive cleaners, as these can damage the siding’s surface. For cleaning high areas, consider using a pressure washer, but maintain a safe distance and avoid excessive pressure to prevent damage. It’s advisable to clean your siding at least once or twice a year, more frequently if you live in an area with heavy pollution or tree pollen. Regular cleaning prevents the buildup of dirt and debris that can trap moisture and lead to problems.
Preventing Moisture Damage and Insect Infestation
Moisture damage is a significant concern for any exterior cladding. Proper caulking, as described above, is a key preventative measure. In addition, ensure adequate ventilation around the building to prevent moisture buildup. Regularly inspect the siding for any signs of damage, such as cracks or loose panels. Repair any damage promptly to prevent water infiltration. For insect infestation, regular cleaning can help deter pests. If you notice signs of infestation, such as insect holes or activity, contact a pest control professional for treatment. They can identify the type of pest and recommend the most effective treatment method. Preventative measures like sealing any gaps or cracks around windows and doors can also minimize the risk of insect infestation.
Post-Installation Inspection and Maintenance Checklist
Before considering the installation complete, a thorough inspection is necessary. This checklist aids in ensuring all aspects of the installation are satisfactory and sets the stage for effective ongoing maintenance.
- Inspect all caulking and sealing for gaps or imperfections.
- Check for any loose or damaged siding panels.
- Verify proper alignment and spacing of siding panels.
- Ensure all fasteners are securely in place.
- Inspect for any signs of water damage or insect infestation.
For ongoing maintenance:
- Clean siding twice yearly (spring and fall).
- Inspect for damage after severe weather events.
- Repair any damage promptly.
- Re-caulk seams and joints as needed (every 2-3 years).
- Schedule pest inspections if necessary.
Visual Aids
High-quality images are crucial for understanding the nuances of insulated siding installation. Visual aids clarify complex steps and ensure a professional-looking finish. The following descriptions illustrate key aspects of the installation process.
Proper Siding Overlap
The image shows two adjacent pieces of insulated siding. The top piece overlaps the bottom piece, creating a watertight seal. The overlap is consistent and even along the entire length of the siding. The visible edge of the top piece completely covers the top edge of the bottom piece, preventing moisture penetration. Notice that the overlap is approximately one inch, the manufacturer’s recommended amount for this specific type of siding. This consistent overlap ensures a uniform appearance and optimal weather protection. The image clearly shows the interlocking mechanism, highlighting how the siding pieces fit together securely.
Correct Siding Fastening
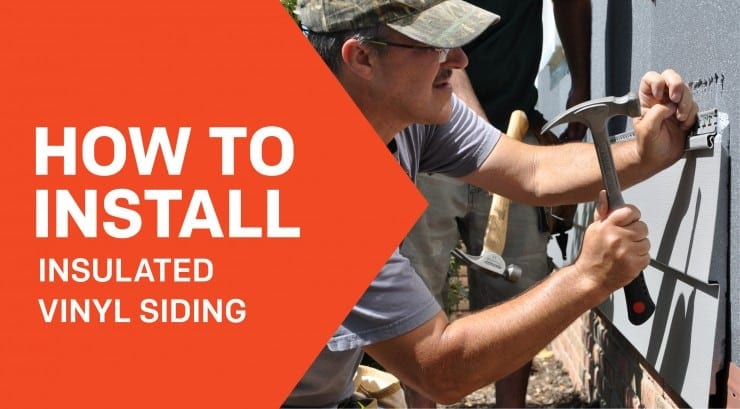
This image depicts the proper method for attaching insulated siding to the wall framing. The siding is fastened using corrosion-resistant nails driven through pre-drilled holes. The nails are placed approximately 6 inches apart and are positioned near the top and bottom of each siding panel. Crucially, the nails are not driven completely flush with the surface; they are slightly countersunk to avoid damaging the siding and to allow for thermal expansion and contraction. The image emphasizes the importance of using the correct type and size of fasteners, preventing splitting or damage to the siding material. The nails are evenly spaced and avoid the center of the panel to prevent stress and breakage.
J-Channel Installation
This image shows a J-channel correctly installed around a window frame. The J-channel is a crucial component for a neat and weather-resistant finish. The image illustrates how the J-channel is secured to the framing using appropriate fasteners. The J-channel sits flush against the framing, providing a clean edge and a protective barrier against moisture. The siding panels will be inserted into the J-channel, creating a secure and weatherproof seal around the window. The image also highlights the proper alignment of the J-channel, ensuring a straight and uniform appearance. The smooth, consistent fit demonstrates the importance of careful measurement and accurate installation.
Last Point
Successfully installing insulated siding enhances your home’s curb appeal, improves energy efficiency, and increases its overall value. By following the detailed steps outlined in this guide, paying close attention to preparation, and utilizing the appropriate tools and techniques, you can confidently undertake this rewarding home improvement project. Remember consistent maintenance will prolong the lifespan of your new siding and ensure its continued effectiveness.