How to maintain insulated siding is crucial for preserving your home’s curb appeal and energy efficiency. This guide delves into the specifics of caring for various insulated siding materials, from vinyl to fiber cement, offering practical advice on cleaning, repair, and preventative maintenance. We’ll explore common issues, seasonal considerations, and the importance of professional inspections, empowering you to keep your siding looking its best and performing optimally for years to come.
Understanding the unique properties of different insulated siding materials is paramount. Proper cleaning techniques vary depending on the material, and regular inspections can prevent minor issues from escalating into costly repairs. By following a proactive maintenance schedule, you can significantly extend the lifespan of your siding and protect your investment.
Understanding Insulated Siding Materials
Choosing the right insulated siding material is crucial for both the aesthetic appeal and energy efficiency of your home. The selection process should consider factors such as climate, budget, and desired maintenance level. Different materials offer varying levels of insulation, durability, and aesthetic options. Understanding these differences is key to making an informed decision.
Insulated Siding Material Comparison
The following table summarizes the pros, cons, and maintenance requirements of common insulated siding materials. Remember that the actual performance of any material can vary based on installation quality and environmental factors.
| Material Type | Pros | Cons | Maintenance Requirements |
|---|---|---|---|
| Vinyl | Affordable, low maintenance, variety of colors and styles, resists moisture | Can be easily damaged by impact, may fade in intense sunlight, less durable than other options | Regular cleaning with soap and water; occasional repair of minor damage. |
| Fiber Cement | Durable, fire-resistant, resists insects and rot, low maintenance | More expensive than vinyl, heavier and more difficult to install, can crack if not properly installed | Periodic cleaning; repair of cracks or chips as needed; painting every 5-10 years depending on climate. |
| Foam-Backed Siding (e.g., Polyurethane, Polyisocyanurate) | Excellent insulation value, lightweight, relatively easy to install | Can be damaged by impact, susceptible to moisture damage if not properly sealed, may not be as aesthetically versatile as other options | Regular inspection for damage; repair or replacement of damaged sections; careful sealing around windows and doors. |
Material Composition and Properties
Vinyl siding is typically made from polyvinyl chloride (PVC), a plastic polymer. Its low cost and ease of maintenance are major advantages. However, its relatively low durability and susceptibility to fading in strong sunlight are drawbacks. Fiber cement siding, a composite material, combines cement, cellulose fibers, and other additives. This creates a siding that is incredibly durable and resistant to fire, insects, and rot. Foam-backed siding uses a rigid foam core (polyurethane or polyisocyanurate) laminated to a facing material, often vinyl or fiber cement. The foam core provides excellent thermal insulation, reducing energy costs.
Impact of Climate and Weather
Extreme temperature fluctuations, heavy rainfall, and strong winds can all impact the longevity of insulated siding. In hot, sunny climates, vinyl siding may fade more quickly, while in cold, snowy climates, fiber cement siding might be prone to cracking if not properly installed. Foam-backed siding is particularly susceptible to moisture damage, so proper sealing and installation are critical in regions with high humidity or frequent rainfall. Coastal areas with salt spray pose a unique challenge for all siding types, requiring more frequent maintenance and potentially more durable materials. For example, a home in a desert climate might experience more fading of vinyl siding than one in a temperate rainforest, while a home in a hurricane-prone region might require more robust fiber cement siding to withstand strong winds and potential debris impact.
Regular Cleaning and Inspection
Maintaining the pristine condition of your insulated siding requires a regular cleaning and inspection schedule. Consistent care prevents the buildup of dirt and grime, which can compromise the siding’s aesthetic appeal and, more importantly, its protective capabilities. Regular inspections allow for the early detection and repair of minor damage, preventing more extensive and costly repairs down the line.
Proper cleaning and inspection are crucial for extending the lifespan of your insulated siding and maintaining its energy efficiency. Neglecting these tasks can lead to premature deterioration, reducing the effectiveness of the insulation and potentially increasing your energy bills.
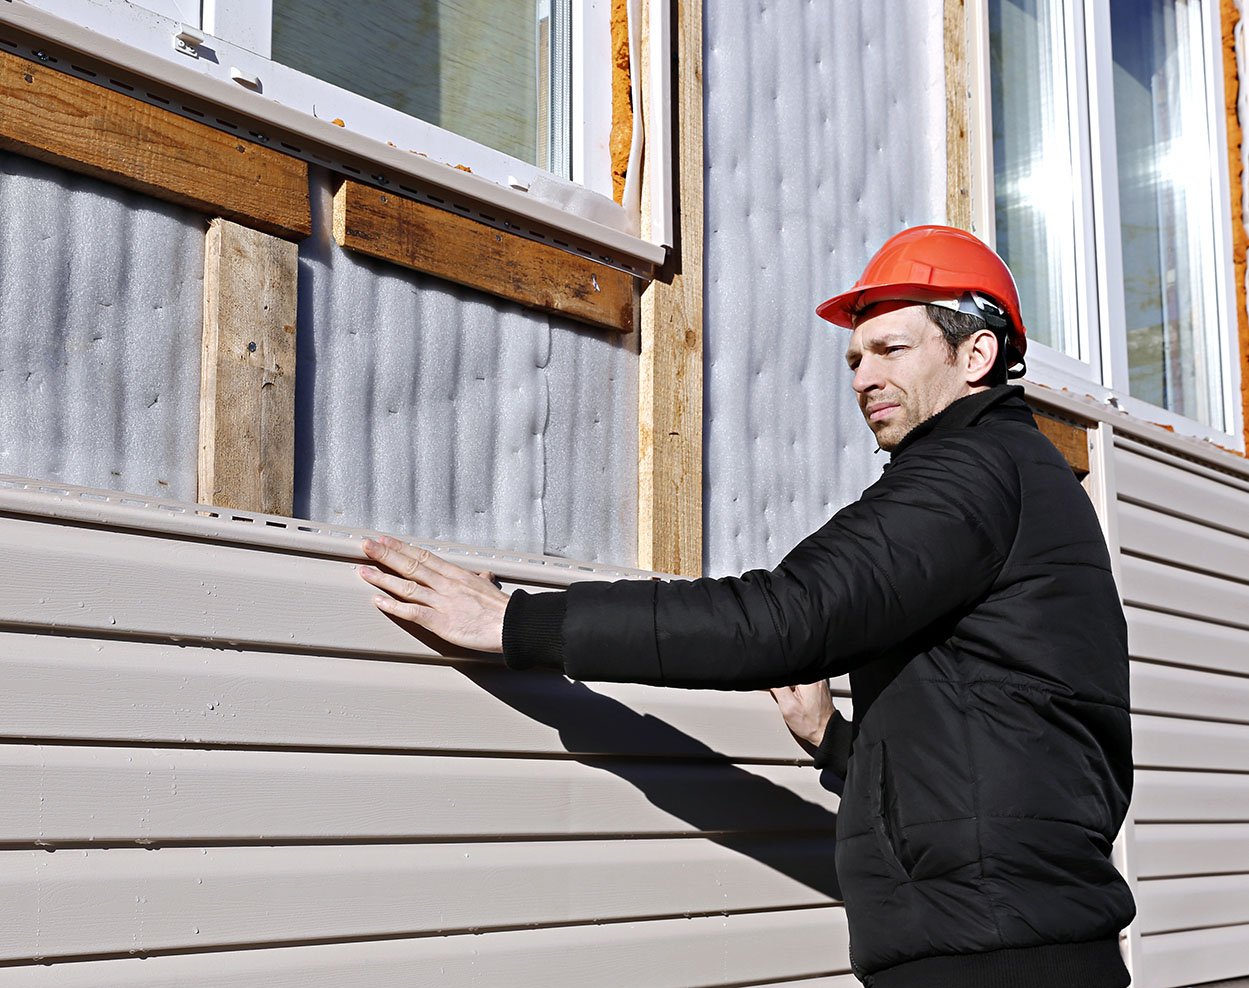
Cleaning Insulated Siding
Regular cleaning removes dirt, pollen, mildew, and other debris that can accumulate on the surface of your siding. This helps maintain its appearance and prevents damage from prolonged exposure to these elements. A thorough cleaning should be performed at least twice a year, in spring and autumn.
- Gather your supplies: You will need a garden hose with a nozzle, a soft-bristled brush (avoid stiff brushes that could scratch the siding), a bucket, mild detergent (a solution of dish soap and water is generally sufficient), and a ladder (if necessary for reaching higher areas).
- Prepare the cleaning solution: Mix a small amount of mild detergent with water in your bucket. Avoid using harsh chemicals or abrasive cleaners, as these can damage the siding’s finish.
- Rinse the siding: Begin by rinsing the entire surface of the siding with a garden hose to remove loose dirt and debris. Use a low-pressure setting to avoid damaging the siding.
- Apply the cleaning solution: Dip your soft-bristled brush into the soapy water and gently scrub the siding in sections, working from top to bottom. Pay particular attention to areas with noticeable dirt or grime.
- Rinse thoroughly: Once you have scrubbed the entire surface, rinse the siding again with the garden hose to remove all traces of soap. Ensure that all soap residue is removed to prevent streaking or build-up.
- Allow to dry: Let the siding air dry completely. Avoid using high-pressure water jets or power washers, as these can damage the siding or force water behind it, leading to potential moisture problems.
Addressing Minor Damage
Minor scratches and dents are common occurrences with insulated siding, especially in areas exposed to high winds or impacts from debris. Early detection and repair of such damage prevent further deterioration and maintain the siding’s overall appearance and integrity.
Minor scratches can often be buffed out with a fine-grit sandpaper and then touched up with a paint that matches the siding’s color. Dents, if not too deep, may be able to be gently pushed back into place using a soft mallet and a block of wood to protect the siding surface. For more significant damage, professional repair may be necessary.
Visual Guide to Cleaning Insulated Siding
The visual guide would depict three panels, each representing a different common insulated siding material: vinyl, fiber cement, and aluminum.
Panel 1 (Vinyl Siding): This panel shows a person using a soft-bristled brush and a bucket of soapy water to gently scrub a section of vinyl siding. The hose is shown rinsing the siding before and after the scrubbing process. The image emphasizes the gentle scrubbing motion to avoid scratching the surface. The tools are clearly labeled, and the text “Use mild detergent and avoid harsh chemicals” is displayed.
Panel 2 (Fiber Cement Siding): This panel shows a person using a soft brush and a pressure washer (set to a low-pressure setting) to clean fiber cement siding. The image highlights the importance of using a low-pressure setting to prevent damage to the siding’s surface. The text “Low-pressure washing is recommended” is clearly visible.
Panel 3 (Aluminum Siding): This panel illustrates the cleaning of aluminum siding using a garden hose and a soft sponge. The image emphasizes the ease of cleaning aluminum siding and the absence of the need for harsh chemicals or scrubbing brushes. The text “Simple rinsing often suffices” is shown. All three panels use clear and concise labeling to guide the viewer.
Addressing Common Issues
Insulated siding, while durable, can experience problems over time. Understanding these common issues and their solutions is crucial for maintaining the longevity and aesthetic appeal of your home’s exterior. Proactive maintenance and prompt repairs can prevent minor problems from escalating into costly replacements.
Common Insulated Siding Problems
Addressing common problems proactively extends the lifespan of your insulated siding. The following table outlines frequent issues, their causes, solutions, and preventative measures.
| Problem | Cause | Solution | Prevention |
|---|---|---|---|
| Water Damage | Cracks in siding, damaged flashing, improper installation, clogged gutters, failing caulking | Repair or replace damaged siding sections. Reseal cracks and joints with appropriate caulk. Check and repair flashing around windows and doors. Clean gutters and downspouts regularly. | Regular inspections, prompt repair of cracks, proper installation, annual gutter cleaning, and using high-quality caulk. |
| Mold Growth | Water intrusion, lack of ventilation, shaded areas with poor air circulation | Clean affected areas with a solution of bleach and water (follow manufacturer’s instructions carefully). Address the source of moisture. Improve ventilation. | Regular cleaning, prompt repair of water leaks, ensuring proper ventilation, and trimming overhanging branches to increase sunlight exposure. |
| Fastener Issues | Loose or missing fasteners, improper installation, expansion and contraction of the siding due to temperature changes | Tighten loose fasteners or replace missing ones. For significant damage, consult a professional siding installer. | Regular inspections, proper installation techniques, and using corrosion-resistant fasteners. |
| Delamination | Moisture intrusion between the outer and inner layers of the siding. This is often seen as bubbling or lifting of the outer surface. | Unfortunately, delamination often requires replacement of the affected siding panels. Addressing the source of moisture is crucial to prevent further damage. | Preventing moisture intrusion through proper installation, regular inspection, and prompt repair of leaks is paramount. |
Minor Damage Repair Procedures
Repairing minor damage promptly prevents further deterioration. For example, small cracks can be filled with high-quality exterior-grade caulk, matching the color as closely as possible. Before applying caulk, clean the area thoroughly to ensure proper adhesion. Allow the caulk to cure completely according to the manufacturer’s instructions. For more significant damage, such as dents or holes, replacement of the affected siding panel may be necessary. This often requires careful removal of the damaged section and installation of a new panel, ensuring proper alignment and fastening. For larger repairs or if you are unsure about the process, consulting a professional is recommended.
Preventative Measures
Preventative maintenance is key to extending the life of your insulated siding. Regular inspections, at least twice a year (spring and fall), are crucial for identifying and addressing minor problems before they escalate. Pay close attention to areas prone to water damage, such as around windows, doors, and corners. Clean gutters and downspouts regularly to prevent water from accumulating against the siding. Trim overhanging branches to allow for proper air circulation and sunlight exposure, helping to prevent moisture buildup and mold growth. Addressing minor issues promptly, such as tightening loose fasteners or sealing small cracks, will save you significant costs and headaches in the long run.
Seasonal Maintenance
Insulated siding, while durable, requires seasonal attention to maintain its optimal performance and longevity. Regular maintenance checks, tailored to the specific challenges each season presents, will help prevent damage and extend the lifespan of your siding. Neglecting seasonal maintenance can lead to issues ranging from minor cosmetic imperfections to significant structural problems.
Spring Maintenance Checklist
Spring cleaning focuses on removing winter’s accumulation and preparing the siding for warmer weather. This involves a thorough inspection for any damage sustained during the colder months.
- Inspect for any cracks, loose panels, or damage caused by ice or snow. Pay close attention to areas prone to water accumulation, such as corners and seams.
- Clean the siding using a gentle pressure washer or a soft brush and mild detergent. Avoid harsh chemicals that could damage the siding’s finish.
- Check caulking around windows and doors for any gaps or cracks. Reapply caulk as needed to prevent water infiltration.
- Inspect gutters and downspouts to ensure they are clear of debris and directing water away from the foundation and siding.
Summer Maintenance Checklist
Summer maintenance focuses on protecting the siding from intense heat and potential damage from storms. Regular inspection is crucial during this period.
- Inspect for any signs of fading or discoloration due to prolonged sun exposure. This is particularly important for lighter-colored sidings.
- Check for any signs of insect infestation, such as wood-boring insects or termites. Address any infestations promptly to prevent further damage.
- Clean the siding regularly to remove dirt, pollen, and other debris that can accumulate during the summer months. A simple rinse with a garden hose is often sufficient.
- Trim any overhanging branches that could scrape against the siding during storms or create areas of shade conducive to moisture buildup.
Autumn Maintenance Checklist
Autumn maintenance focuses on preparing the siding for the upcoming winter months and removing any debris accumulated during the fall season. This proactive approach minimizes the risk of winter damage.
- Clean gutters and downspouts thoroughly to remove leaves and other debris that could clog them and cause water damage.
- Inspect the siding for any loose or damaged panels that could be vulnerable to winter weather. Repair or replace any damaged sections promptly.
- Check caulking around windows and doors and repair any gaps or cracks to prevent water infiltration during winter storms.
- Inspect for any signs of pest activity and address any issues promptly before the onset of winter.
Winter Maintenance Checklist
Winter maintenance involves minimizing the impact of snow, ice, and freezing temperatures on the siding. Regular checks are essential to ensure the integrity of the siding.
- Regularly remove snow and ice buildup from the siding to prevent damage from excessive weight or melting and refreezing cycles. Avoid using sharp tools that could scratch the siding.
- Monitor for ice dams on the roof, which can cause water damage to the siding. Addressing ice dams promptly is crucial.
- Inspect the siding for any signs of damage caused by ice or snow. Repair any damage as soon as possible to prevent further deterioration.
- Keep gutters and downspouts clear of ice and snow to ensure proper water drainage.
Climate Considerations
Maintenance needs vary significantly depending on the climate. Areas with harsh winters, for instance, require more frequent snow and ice removal, and more attention to caulking and sealing to prevent water damage. Conversely, areas with hot, humid summers may require more frequent cleaning to remove algae and mildew growth. Coastal regions might require additional attention to protect against salt spray corrosion. For example, a homeowner in Alaska will need to prioritize snow removal and ice dam prevention far more than a homeowner in Southern California, who might focus instead on preventing sun damage and addressing potential mildew issues.
Long-Term Care and Repair
Investing in regular maintenance significantly extends the lifespan of your insulated siding and protects your home’s exterior. Proactive care prevents minor issues from escalating into costly repairs, safeguarding your investment and maintaining your home’s curb appeal. Neglecting maintenance can lead to premature deterioration, necessitating more extensive and expensive interventions down the line.
Regular professional inspections are crucial for identifying potential problems before they become major headaches. A qualified inspector can spot subtle signs of damage, such as loose panels, water intrusion, or insect infestation, allowing for timely and cost-effective remediation. This preventative approach avoids the expense and inconvenience of more extensive repairs or even complete siding replacement.
Professional Inspections for Insulated Siding
Professional inspections should be conducted at least every two years, or more frequently in harsh weather climates or if noticeable damage is observed. During an inspection, a professional will assess the overall condition of the siding, checking for cracks, gaps, loose fasteners, and signs of moisture penetration. They will also inspect for signs of insect or rodent damage, which can compromise the structural integrity of the siding and the insulation beneath. A detailed report outlining any necessary repairs or preventative measures should be provided following the inspection. The cost of a professional inspection is a small price to pay compared to the potential costs of neglecting maintenance.
Replacing Damaged Siding Sections
Determining when to replace damaged sections depends on the severity and extent of the damage. Minor scratches or superficial damage often require only cleaning and repainting. However, significant damage, such as large cracks, holes, or water damage affecting multiple panels, necessitates replacement. Rotting or severely damaged sections should always be addressed promptly to prevent further deterioration and potential structural issues. Consider replacement if more than 10% of your siding shows significant damage or if repairs become excessively costly. For example, if multiple panels along a section of the house are water damaged after a severe storm, replacement may be more cost-effective than individual repairs.
Selecting a Qualified Contractor
Choosing a qualified contractor for siding repair or replacement is crucial to ensure quality workmanship and a long-lasting repair. Thoroughly research potential contractors, checking their licensing, insurance, and experience. Request references and check online reviews to gauge their reputation and customer satisfaction. Obtain multiple written estimates, comparing the scope of work, materials used, and the total cost. Verify that the contractor has experience working with insulated siding, understanding the specific requirements for installation and repair. Ensure the contract clearly outlines the work to be performed, payment schedule, and warranty information. A reputable contractor will provide clear communication throughout the project, addressing any concerns promptly and professionally.
Protecting Against Pests and Weather
Insulated siding, while durable, requires proactive measures to safeguard it from pest infestations and the damaging effects of extreme weather. Regular maintenance and preventative strategies are key to extending the lifespan and maintaining the aesthetic appeal of your siding. Ignoring these aspects can lead to costly repairs and compromise the insulation’s effectiveness.
Protecting your insulated siding involves a two-pronged approach: preventing pest damage and mitigating weather-related harm. Both are crucial for long-term protection and maintaining the structural integrity of your home.
Pest Control for Insulated Siding
Preventing pest infestation begins with identifying potential entry points. Rodents and insects often seek shelter within cracks, gaps, or damaged areas of the siding. Regular inspections are crucial for early detection. A thorough examination of the siding, paying close attention to seams, corners, and areas around windows and doors, will help identify vulnerabilities. Addressing these issues promptly will prevent further damage.
- Seal all gaps and cracks: Use caulk or sealant designed for exterior use to fill any gaps or cracks in the siding, particularly around windows, doors, and utility penetrations. This prevents insects and rodents from gaining access.
- Install pest barriers: Consider installing mesh screens or metal flashing over potential entry points, such as vents or gaps around pipes. This creates a physical barrier that prevents pests from entering.
- Maintain landscaping: Keep vegetation trimmed back from the house to reduce hiding places for pests and to improve airflow around the siding. This discourages insects and prevents moisture buildup.
- Regular inspection: Conduct regular inspections, at least twice a year (spring and fall), to check for signs of pest activity, such as droppings, gnaw marks, or insect holes.
Weather Protection for Insulated Siding
Extreme weather conditions can significantly impact the longevity of insulated siding. Heavy rain can lead to water damage and mold growth, while strong winds can dislodge panels. Snow accumulation can cause stress on the siding and potentially lead to structural damage. Proactive measures can significantly mitigate these risks.
- Proper installation: Ensure the siding is properly installed according to the manufacturer’s instructions. This includes using appropriate fasteners and ensuring proper overlapping of panels to prevent water penetration.
- Regular cleaning: Clean the siding regularly to remove dirt, debris, and leaves that can trap moisture and encourage mold growth. This is particularly important in areas with heavy rainfall or snowfall.
- Gutter and downspout maintenance: Keep gutters and downspouts clean and free of debris to prevent water from accumulating near the foundation and causing damage to the siding.
- Trim overhanging branches: Trim any overhanging tree branches that could potentially damage the siding during storms or cause moisture accumulation.
Visual Representation of Pest Control and Weather Protection
Imagine an image depicting a house with insulated siding. The siding is shown in good condition, with a uniform color and no visible damage. Around the foundation, the landscaping is neatly trimmed, leaving sufficient space between the vegetation and the house. Small, barely noticeable details illustrate the preventative measures: a thin line of caulk sealing a crack near a window, a small piece of metal flashing covering a vent, and gutters that are clean and free of debris. The image also depicts strong winds blowing across the house, but the siding remains securely in place, highlighting the robustness of the installation. In the background, a light rain shower is falling, but the siding appears unaffected due to its proper installation and maintenance. The overall impression is one of a well-maintained home, protected from both pests and the elements.
Concluding Remarks
Maintaining insulated siding involves a multifaceted approach encompassing regular cleaning, prompt attention to minor damage, and seasonal checks. By understanding your siding material’s specific needs and implementing preventative measures, you can ensure its longevity and protect your home from the elements. Remember that professional inspections are key to identifying potential problems early on, saving you time, money, and headaches in the long run. A well-maintained exterior enhances your home’s value and provides peace of mind.